
The 6 P's
Holy crap, a lot has happened since I painted the car. We’ve finished the paint, fabricated some stuff, had a test day at the track, new wheel setup, and even a livery applied.
If you remember, one of my big goals for 2020 was to compete in motorsport. It could be anything, from cone killing autocross, to endurance racing with Lucky Dog. I met myself in the middle and signed up to Global Time Attack at my home track The Ridge in mid June. The next post will go into that entire experience.
Put on a pot of coffee, cut yourself a slice of pie (you always have pie in the house, right?), and settle in for a barn-burner post.
Theres a couple hundred hours of work in this post… so bear with me if I gloss over a lot of the minutia and small details I usually drone on and on about.
Proper Preparation Prevents Piss Poor Performance. The 6 P’s I had been told about since middle school. If you really prepare for something well, you will perform well when the pressure is on. This is something I’ve really started to do with the car, especially in terms of track days.
The paint was curing, Covid 19 was still on the rise, and I had time. I also had LOTS of orange peel. The good news, orange peel is fixable, the bad news, it’s very time consuming. Here’s an example pic.

Yuck. That beautiful black has no deep sheen to it with the orange peel my clear coat left behind.
To fix that, we needed to wetsand the entire car (again), and then again, and then again.
After that, we need to buff the entire car, again, and again.
First, let’s give her the first wash since paint.

Then we loaded up the garage cart with lots of supplies. A bunch of 2000/2500/3000 grit sandpaper, 3M perfect 3 stage polish, clean microfibers, masking tape, and other various cleaners, polishers, and whirlybangs.

To get rid of orange peel the hard way, you need to sand down the clear coat to a flat finish, then polish and buff out the sanding scratches. Most youtube videos document this pretty well. I really didn’t have the patience to hand-sand the entire car again, so I opted to use a DA sander with my air compressor.
With a huge overwhelming job like this, the best way to do it is one panel at a time. That way you can focus on what’s in front of you, and not overload yourself. I did the paint finishing over about two weeks, working a few hours each day. I like to tape off each panel to help stop polish getting into every crack and crevice. (it helped… but not really)

Using wetsanding techniques, I knocked down all the orange peel I was confident my polisher could reach. I started with 2000 grit, then 2500, and finished with 3000.
Then, you break out the polisher with 3M stage one polish compound and pad.

After a few passes it’s starting to look decent again. Now we clean it best we can with microfibers, and swap to the stage 2 pad on the polisher and matching polish.

Yup, LOTS of sling. I had compound EVERYWHERE. On the ceiling, on the windows, even on my truck parked outside the shop. If you clean it up as fast as you can, it really isn’t too bad. If you let it dry, it takes a few swear words and wet rag to get off.

Now we’re starting to get the mirror back into the finish!
Onto stage 3, which really is just to remove the polisher swirl marks.


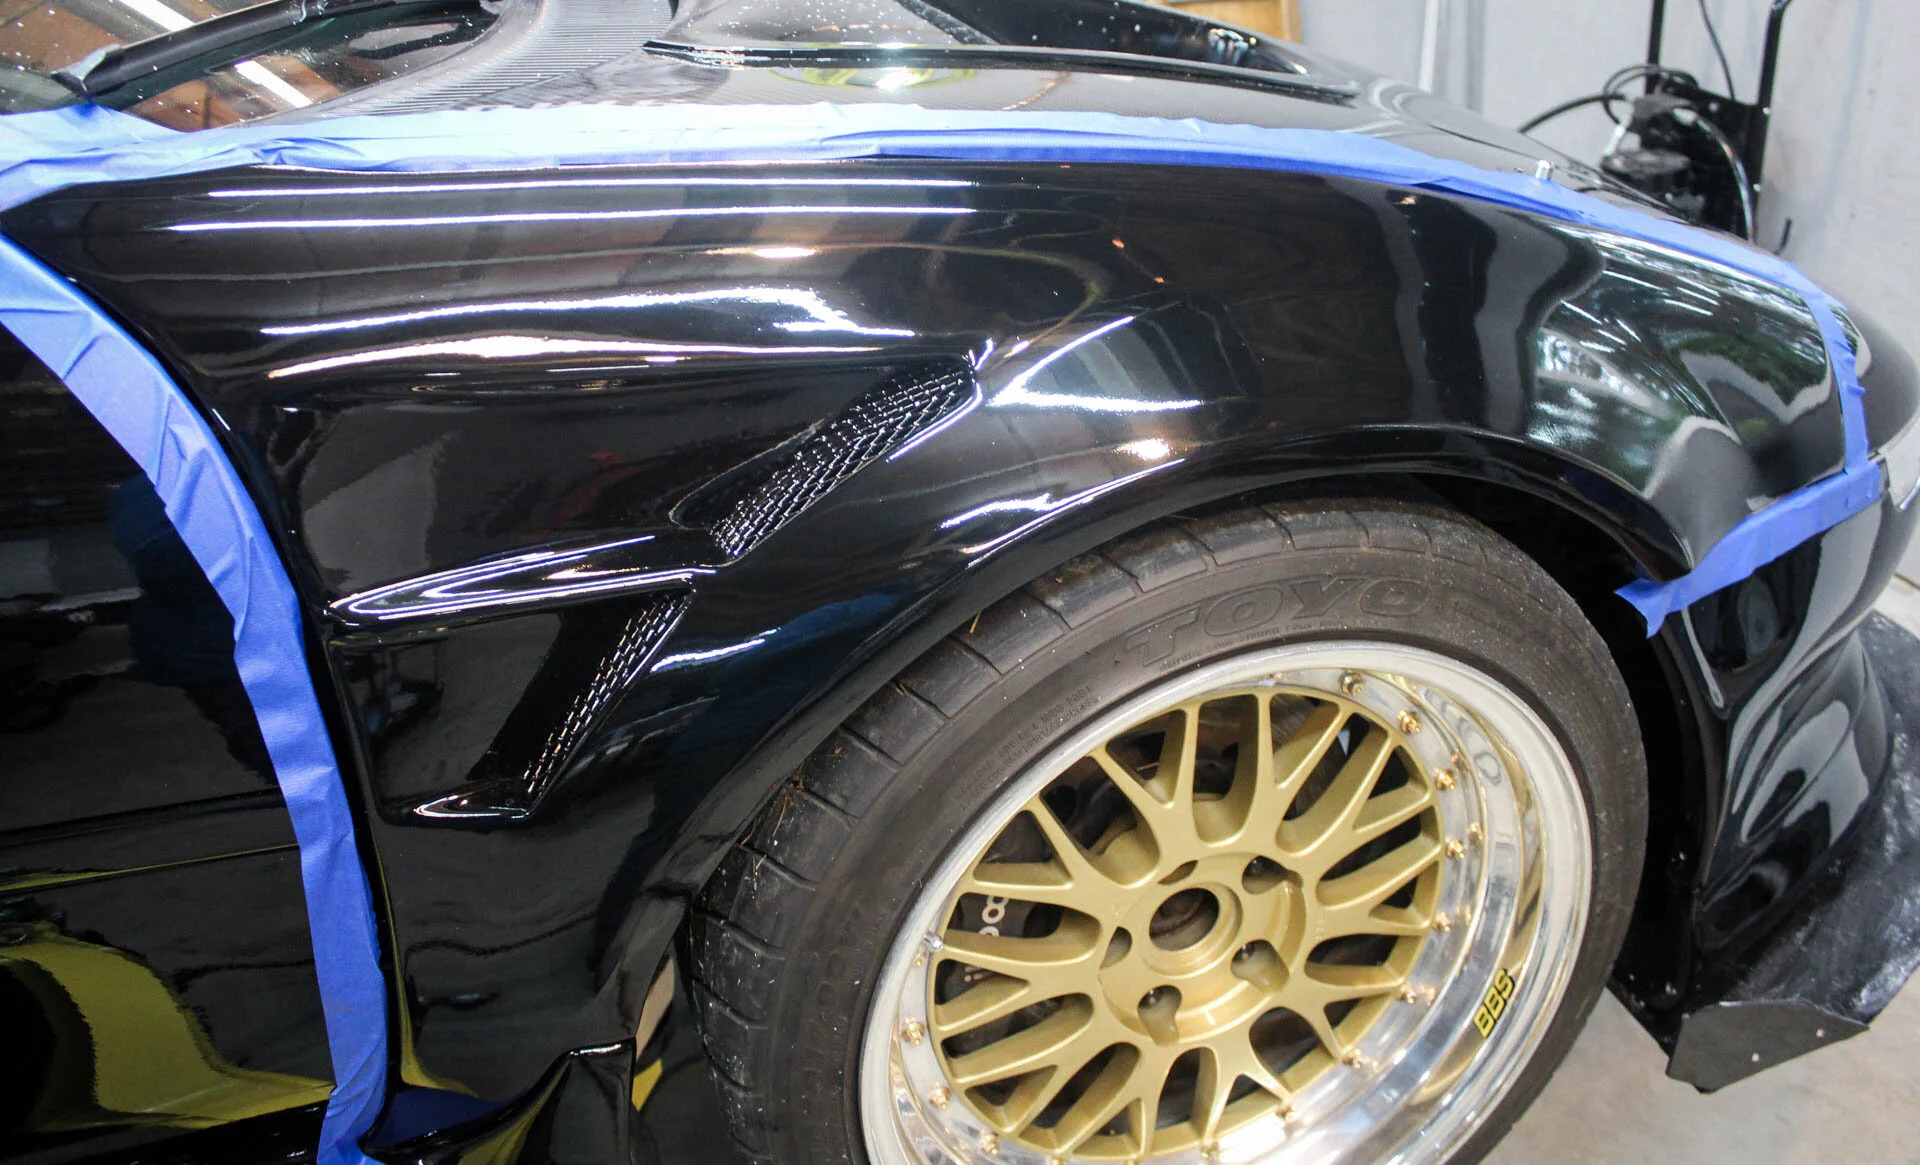
Here you can see the difference between the fender and the door. The clarity of the reflection on the fender is what we’re going for here.
I’m in no way a professional, and my techniques are all self taught with the help of youtube. I’m sure I could do better, but at the end of the day it’s a track car, not a concourse winner. I do have some sander scratches and swirl marks under my garage lighting. But in outdoor natural lighting… I was surprised how good it looked.
So, now we move onto the front of the car. In the next pic you’ll see all the dirt and dust that settled into the clear as it cured. I thought I had the dust under control… but must have screwed something up on the last coat. All this can be wetsanded out pretty easily.

After sanding. This is important, only sand what you know your buffer can reach!

I forgot a pic after polishing, but it turned out pretty good! What followed was a solid 30ish hours of rinse and repeat. The entire exterior needed this treatment. I will show you guys the highlights.

You can really see how bad the doors were. Bottom was just hit with 2000 grit to knock down the orange peel.

Bottom half done. The difference is really noticeable in real life but hard to capture in photos.

I pulled the flares to make sure the finish was consistent. I also was starting to get decent at the process by now.

Not bad! Not perfect… but totally acceptable. But, here’s the reality to that picture.

Such a mess. So much cleaning after every compound stage.

There were mistakes. I burned through the paint in a couple of spots. Here’s one on the gas door.
I’m not telling you where the others are.

It’s hard to show the leftover sanding scratches in a photo, but you can see one here. They’re called curly tails. They happen when the DA sandpaper picks up a piece of dirt and grinds it into the finish. Dirt happens. I was getting pissed about it… but you have to be realistic about your expectations. I could probably get all these scratches out, but it would take a lot more wetsanding by hand, and I really didn’t want to burn all the way through my clear coat.
It’s important to mention, these kind of defects wouldn’t show up on other colors, especially with a flake in it. I kind of set myself up for disappointment with black. It shows EVERY little defect.

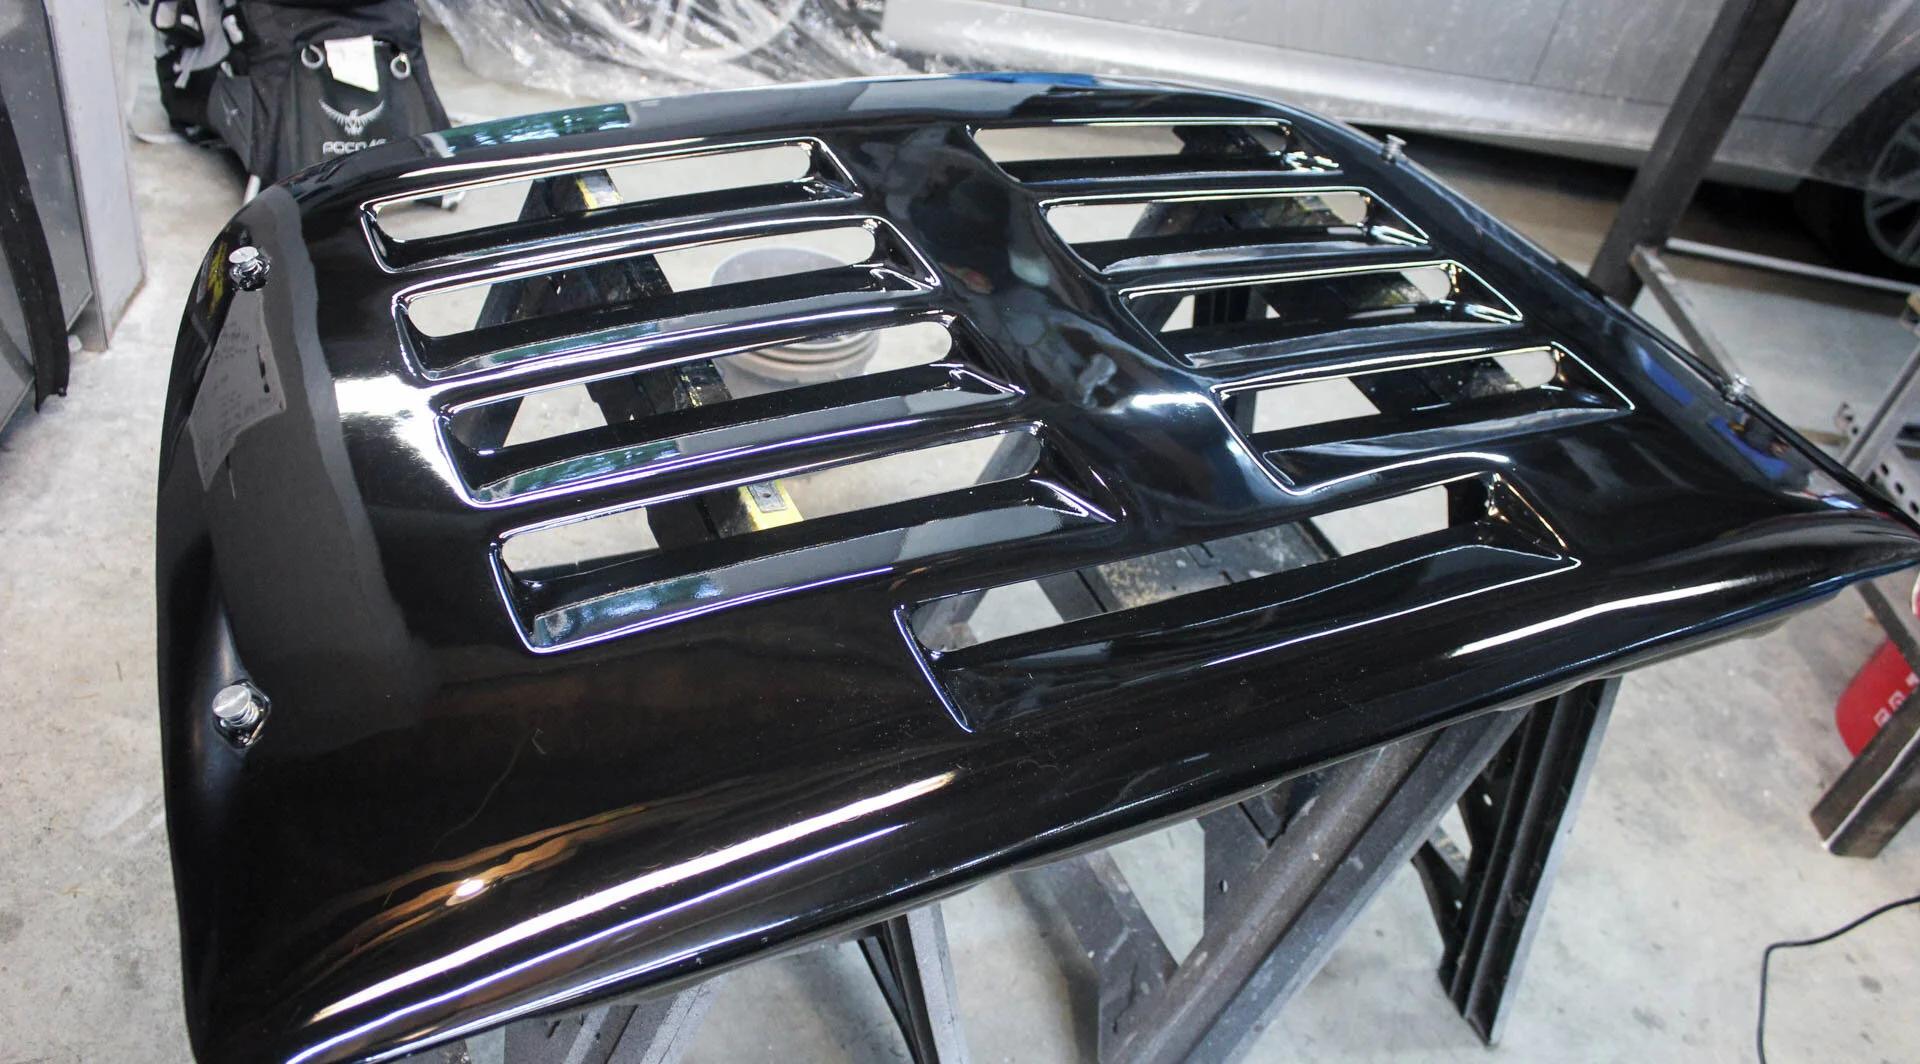
By the time I got to the engine lid I admit I was burnt out. It didn’t get my full focus, I just wanted to wrap this up. I got a lot of dirt out of the paint and gave it a decent polish. I can always go back and re-polish when I get a wild hair up my you-know-what.
As a finishing touch, I channeled my inner RWB. The seam between the vent and carbon hood was still a rough cut. I picked up some sikaflex and laid tape along the edges. Using my finger I finished the seal around the hood vent. Turned out decent!

With the paint finished and some good weather, I had to get out for a rip.


I love my local roads, this one is about ten minutes from my house.
Back in the shop, I had a long list of stuff to get done before GTA. I was about 5 weeks out from the GTA weekend.
I’ve never been fully satisfied with my suspension stiffness. I uprated the springs once using Swifts and the car rode great, but still felt a little soft on track. Not to mention I bottomed out on one part of The Ridge every lap still.
Rather than do the smart thing and raise the suspension up 3/8” (something I refuse to do), I set about upping my springrates once again. After a lot of research, I decided to give Eibach springs a try. You can order them in popular coilover sizes, 2.5” ID, and whatever length and springrates you want.
My original BC coils were 6k/8k, then my Swifts with 8k/10k. For the Eibachs I went up one more click, to 10k/12k. Actually, you order Eibach springs in pound/inches (JDM fanbois are the ONLY guys who talk kg/mm for springrates), so mine are 550 lb/in and 700 lb/in, technically 9.8k/12.5.
Yes, my BC dampers will now likely not be able to handling the stiffer springs very well at all. I plan to either upgrade the entire coilover this winter, or at least upgrade the dampers. This is more of an experimental upgrade as of now.
The Eibachs are considerably cheaper than the Swifts, and it’s well known brand, so I decided to give them a shot.

Install is pretty easy. Remove the coilover, take off the top hat, swap springs, reinstall tophat, and reinstall coilover. Pretty easy. Just a 2 hour job taking your sweet time like I do.


Here’s the front right back in. Make sure you tighten those gland nuts all the way!

Since we just took out and reinstalled the entire suspension, an alignment is needed. Rather than make an appointment at my local firestone, and spend half a Saturday driving down, struggle to drive onto the rack, get the alignment done, drive all the way home and reinstall my splitter… I decided to buy some simple tools and give it a go myself.

This is already a monster post… so I’m going to save the DIY alignment for a later date for you guys. It took me a few hours to do the first one, and the next one I did was much easier. Once you can setup the car reasonably quickly, you can play with different setups all the time.
So, with the alignment done, came my next BIG purchase. For Global Time Attack, I was signed up for Street class. One of the rules for GTA this year was you had to run their spec tire, the Yokohama A052. (Actually since it was their first time out here, they relaxed that rule…) If you’re up to date on the hottest track tires out there, you’re well aware the A052 is actually the fastest track tire out there right now. It’s considered a 200tw tire, but wears very quickly, but delivers outstanding grip.
I knew my almost chorded, 3 year old Toyo R1Rs weren’t gonna cut it. My last track day last year I knew the tires were holding me back, and they were heat cycled out by then. My best lap was a 1:57.1.
Since I signed up for GTA in the winter, I’ve been contemplating my tire choice. The big decision here is… NOBODY MAKES A DECENT 200TW TIRE WIDER THAN 255 IN 17”! Nobody! Toyo makes the R1r, and there’s the Falken 615k+, which also is antiquated and way off pace compared to the BFG Rival 1.5 and Bridgestone RE-71r.
The more you get into tracking your car, the more you realize tires are everything. They can make you a hero or a clown. You can have 700whp, but if you show up on 400tw all seasons, prepare to get spanked by a 120hp EK hatch on RE71s.
After hemming and hawing for damn near 3 months, I pulled the trigger on some tires, the A052. 245/40/17 front and 265/35/18 rear. My BBS LMs are 17” front and back. So I also needed new wheels to run any of the hot track day tires.
I hemmed and hawed for another month… and finally pulled the trigger on some Konig Dekagrams. 17x9 and 18x10.5.

Konig is a pretty decent up and coming brand. They used to mostly make replicas… but they’ve turned a corner on their designs and manufacturing techniques. While not forged, they are flow formed providing decent strength to weight. Lots of top time attack guys run them without issues. And…they’re totally affordable. I went down the RPF1 route with my last SW20, they’re great wheels for the price… but I wanted something different.

The bronze looked great with the black car, so glad I went with this over their matte black.

I finally get to show off my BBK a bit. I was a coin toss between the Dekagram and the Hypergram, and overall I really like the Dekagram more seeing them both in person now.

While I got their most aggressive sizes and offsets, I still needed some generous spacers front and rear to get decent fitment. I moved what was my rear spacer with the BBS setup to the front (20mm), and put on a 35mm spacer on the rears. Both spacers are bolt on. No, they’re not dangerous in my opinion. No, they don’t cause any more wear than wheels in the same effective offset. TONS of faster time attack and 1000hp drift teams run larger spacers than these in real motorsport, and yet none of them have issues.


Once mounted I took them out for an initial test drive. Wow, initial grip was outstanding. I could barely get them warmed up enough on my local roads, but I was impressed. The only other decent tires I’ve had were Federal 595 rsr, and the Toyo R1R. So I was in for quite a surprise once I got these on track. They also looked really good on the Konigs.
(Don’t worry, the BBS LMs are tucked away safely awaiting when someone makes a decent tire in 275/40 or wider)
So, the car was feeling really good. But, before heading to a race, professional teams test.
So we needed to test! It was about a month before GTA, so I had some time to fix anything I broke. What I didn’t have, was much money to blow after buying new tires and wheels. But, there’s a local track much closer to me and they were offering a “power hour” of track time for a reasonable $125.
Off to Pacific Raceways we went! If you know the area or know my story well… you know I have some bad blood with Pacific Raceways. It’s a cool track, but it’s old, and really has no safe offs. I’ve blown up a motor there… and crashed my last SW20.

It was mostly my fault, my tires were done-zoh and I hydroplaned into the wall on the front straight.
I haven’t been back in 4 years, but since then I’ve gained a lot of confidence and seat time. The weather looked perfect, mid 70s and sunny.
So, I put on my track exhaust, stuck some ear plugs in, and made the 40 minute trek. Last time I was at Pacific I was running 1:50 laps in my old MR2. I knew I’d be faster with a better chassis, driver, motor, and much better tires…but how much? I set a goal for 1:38.
The car ran really well, and felt great. I was running a solid pace, was felt lost in a few corners. Then I pointed by a GT3 and knew I had to give chase. That’s when I finally saw the light on a few corners and was able to really click some laps.
I was very surprised when I saw a 1:34 on my lap timer. Things were good! The tires felt excellent, amazing turn in and braking zones could really be pushed. Most importantly, nothing broke! I know if I came back and really focused on my driving, I bet a 1:32 or better is there… but we were there just to test the car, not my driving.

When I got home I get the car on the lift and really gave it the once over. My new track prep includes putting a wrench on every bolt I can see. I was surprised when I found a few that weren’t as tight as they should be.
So, in the final prep for the car, we needed a livery!
This is something I’ve been contemplating since I bought this car. I knew it was always going to be black, and thought it would be awesome to have a livery that somehow incorporated the black as a base color.
One day scrolling instagram I came across a post by jonsibal. He does amazing renders of cars that have never really been made in real life.

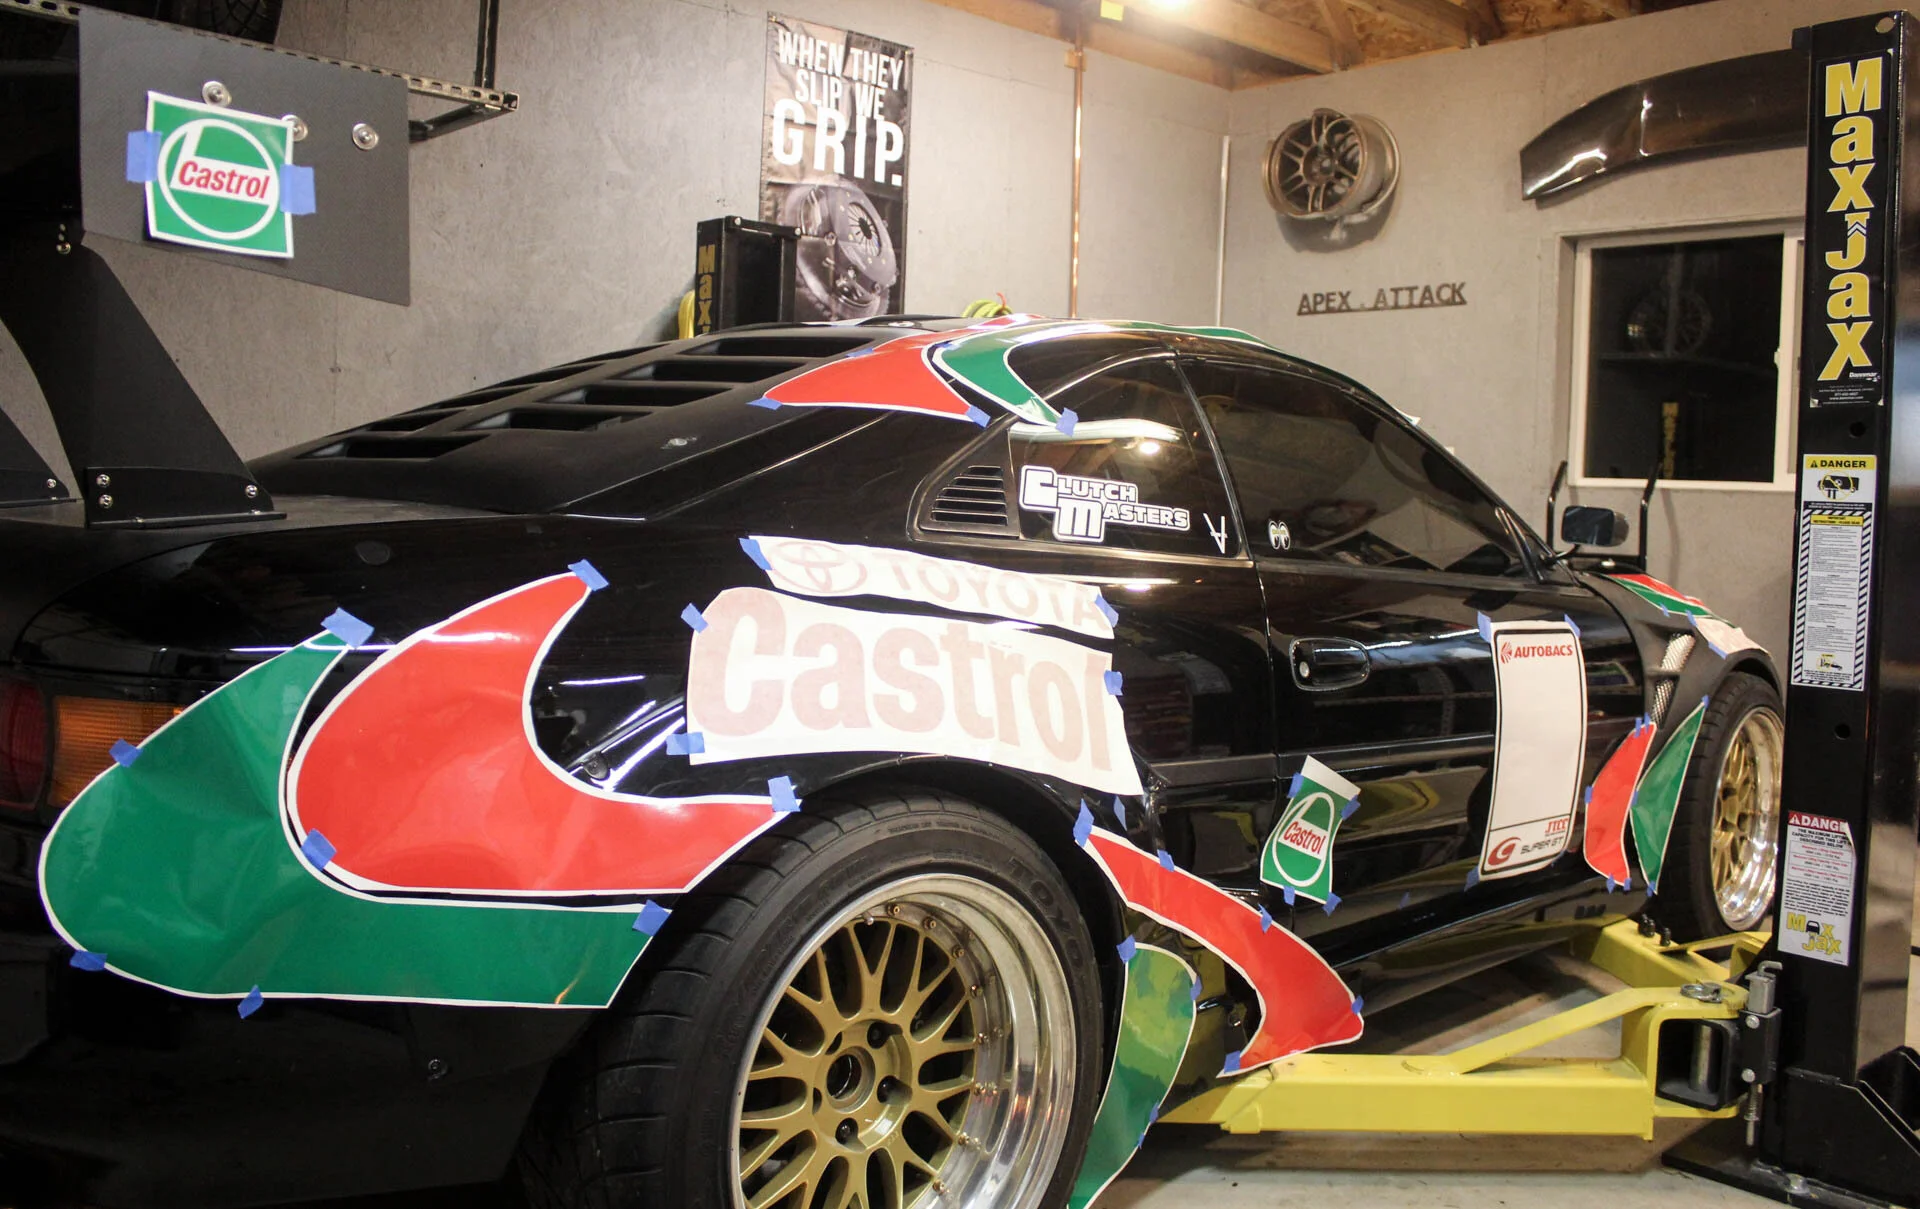
Holy crap, I was in love! Take the old school Castrol Supra livery and throw it on a black mark5 supra. Amazing.
That’s when I knew what I wanted. But how to do it?
Some googling found my answer. Creative-vinyl.com. They replicate all the famous liveries of your childhood as decal packs.
Check out their site, there’s hundreds of cool livery options to play out your 90’s rally/JGTC/Touring Car fantasies.
I ordered the Castrol livery kit for a mark 4 Supra, so we would have some customization to make it fit the SW20 chassis as best we can.
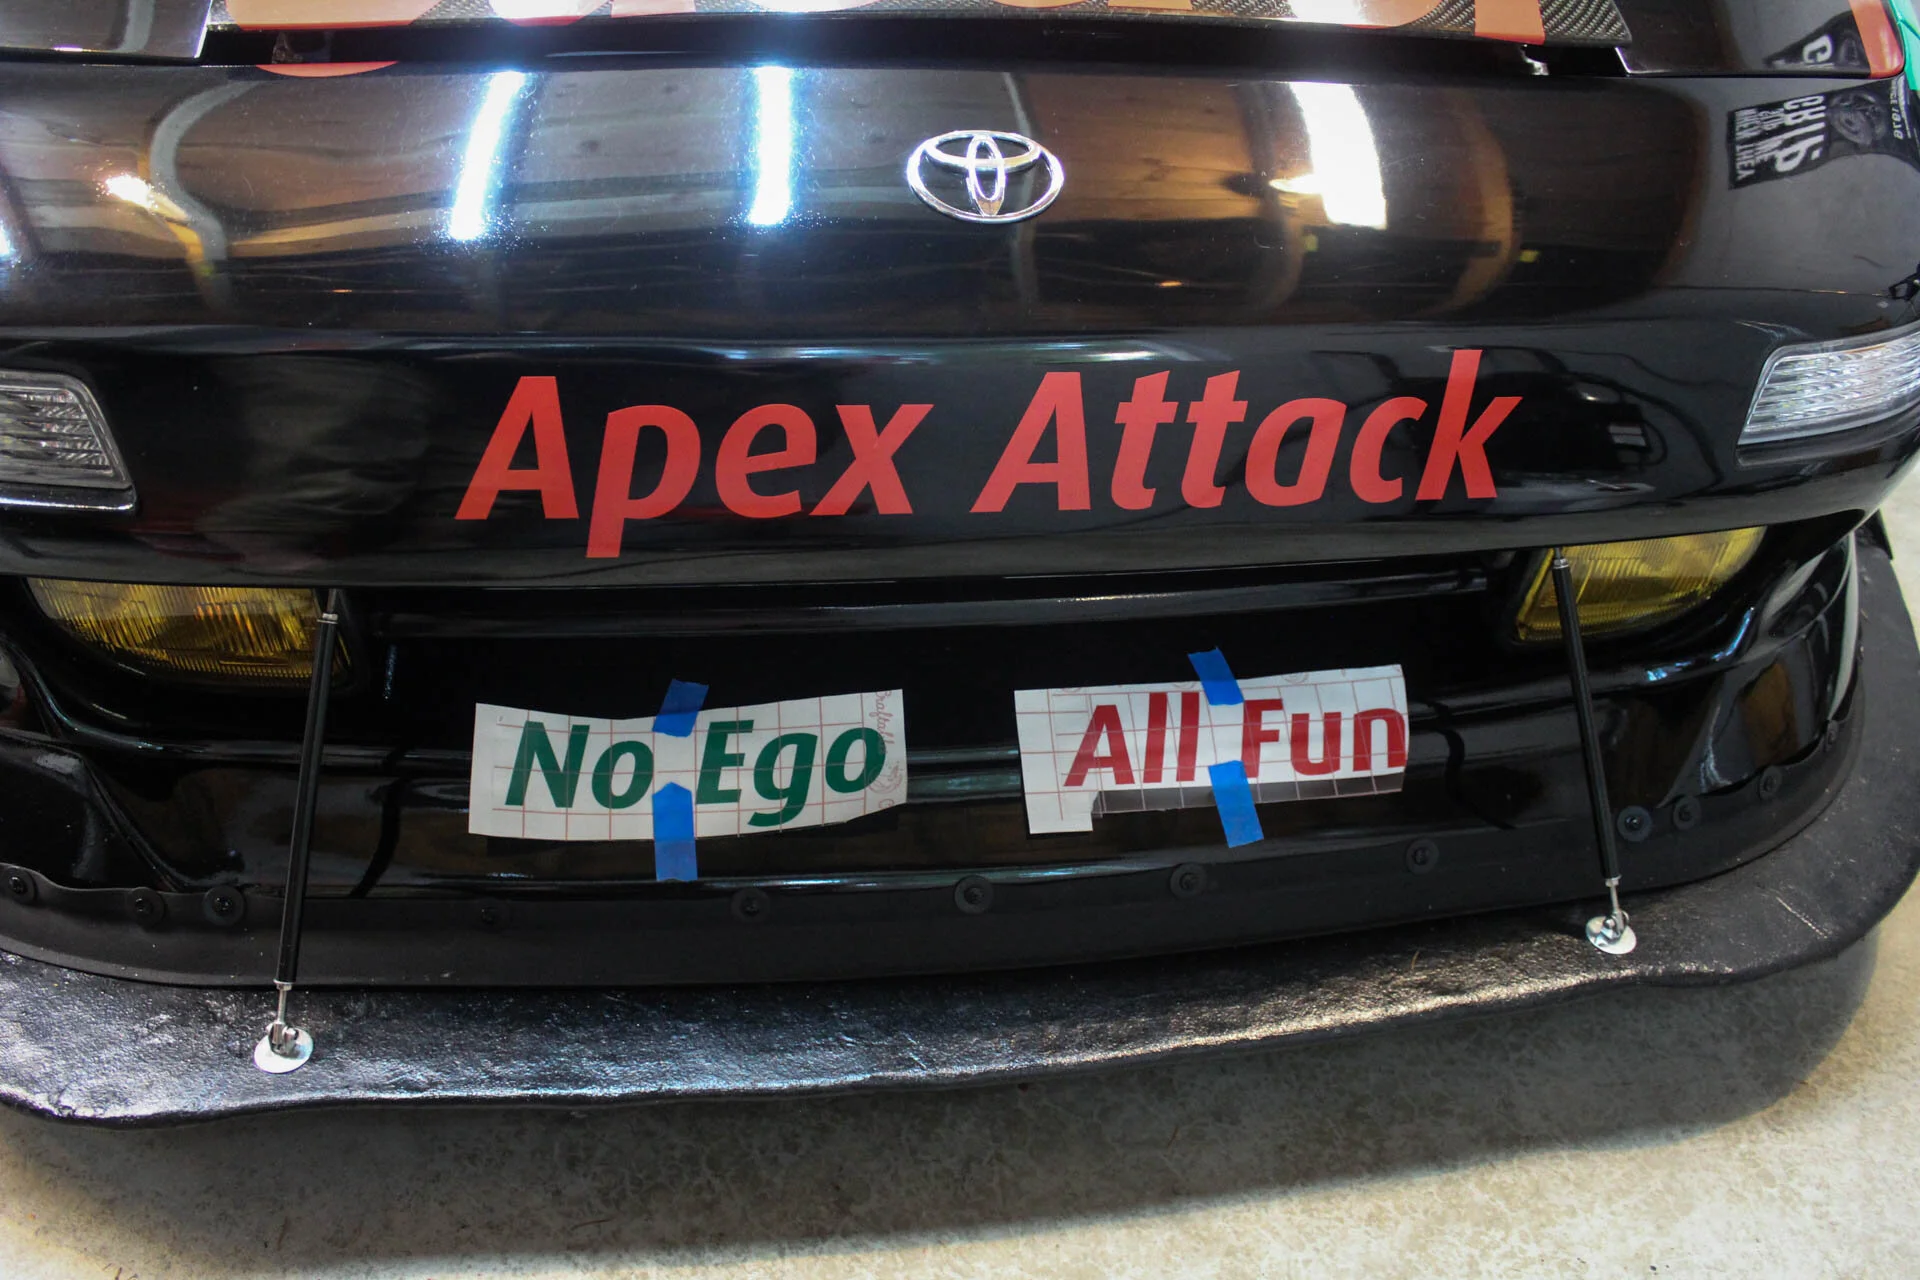
I also asked for some extra vinyl in the red and green colors so I could cut my own sponsors graphics and have them match. My car isn’t replica… I wanted it to have it’s own personal Apex Attack feel to it.
I actually ordered and recieved the kit waaaay back in January. I was so excited when I got it I had to see how close things would line up on my chassis. Supras have a very long hood, and short rear end. Here’s the puzzle you get.

Well damn, it fits pretty good! This pic gave me a ton of push to get the car painted and finished so I could add the livery.
Fast forward a few months and a paintjob later. I was ready to finally apply the kit. I was nervous, I havent done much vinyl work…and if I screwed up a big piece… I had no extras. Youtube once again showed me the way. Using the “hinge method” I was able to get almost everything applied really well.
Here’s how I did it. (your results may vary)

Using some painters tape, fix exactly where you want the sticker. Then use two pieces of tape to secure it in the middle. Peel back the top layer half way on one side (like a hinge) and carefully cut the backer paper with some scissors.
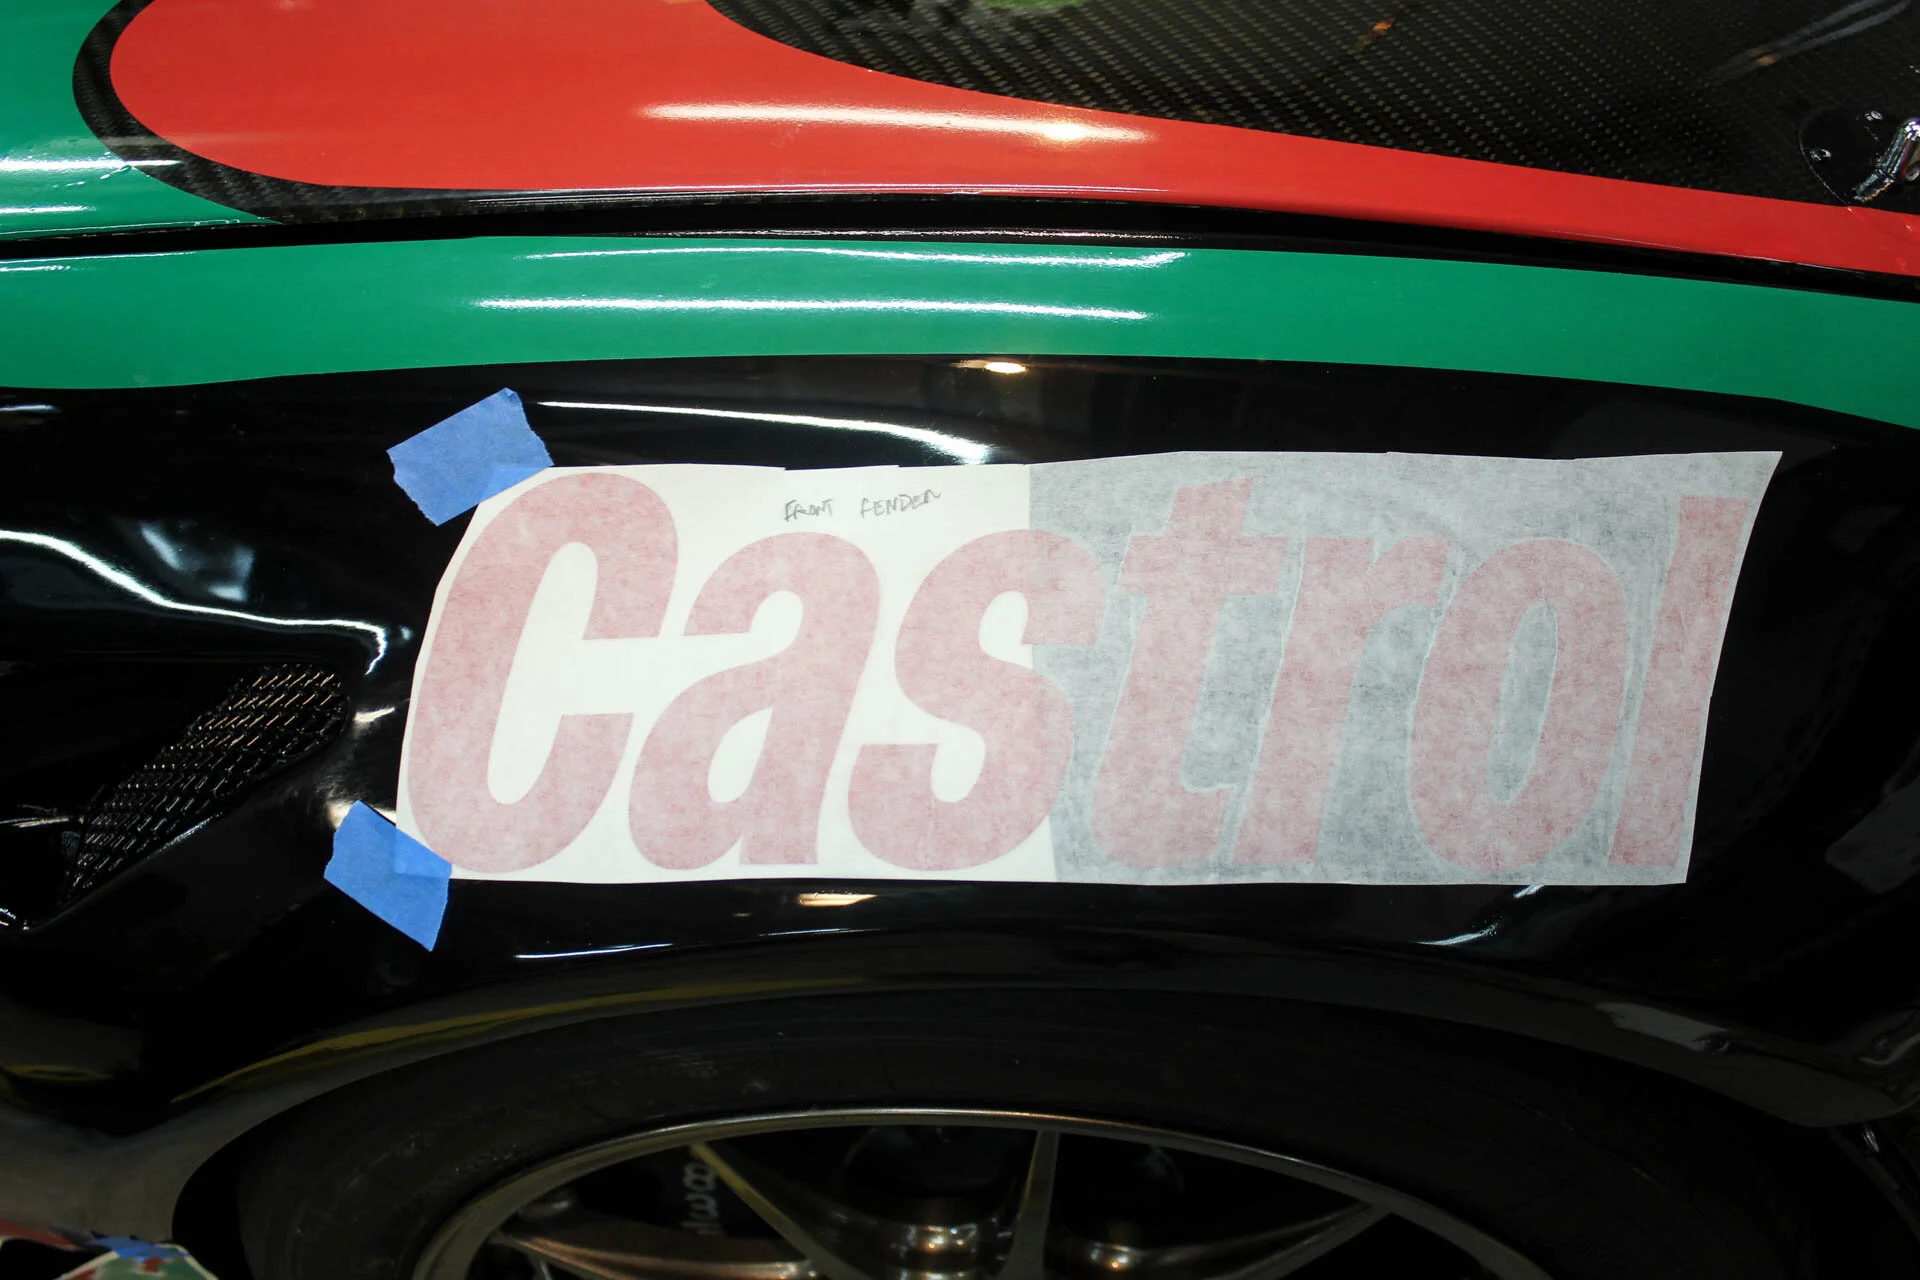
Using a felt tipped squeegee, you can lay the sticker onto the paint and work it flat and remove all the air bubbles. Then pull the left side back (like a hinge) and remove the backer tape and repeat. Once it’s all the way on you can remove the transfer paper. I started with a lot of the smaller easier stickers to get a hang of it before moving onto the big stuff like the hood, roof, and rear quarter graphics.
Speaking of the roof, here’s a play by play.

A lot of measuring and taking a step back to see how things looked. I had my laptop open with pictures of the #36 GT500 Supra as a reference.

Once I liked the placement, I applied the stickers using the hinge method.

My two little squeegees, an xacto knife, and heatgun were my main tools. Applying over panel gaps and things like my dzues pins was challenging. Once it was all laid down nicely, it was time to trim.

Here’s one side of the roof done. I tried that fancy knifeless tape to make cuts… pure garbage with this vinyl. I had much better luck with my xacto. Hopefully I didn’t nick my fresh paint underneath too bad. Guess we’ll find out in a year (or whenever I’m bored of it) when we pull the livery.

Things started to get interesting when doing the rear quarter. It’s a very three dimensional part of the car, so applying the red vinyl was tough. My method here was to loosely apply it to the seam between the skirt and flare, cut it, then work each separately.

The rear part…. same method. First I was lazy, then I got smart and removed the tail light. With the light out applying the green was much easier.

The big roof sticker wasn’t too tough actually.

Once the passenger side was done, moving onto the driver side was a bit easier. But, the time I saved in application, was mostly used up measuring things to try and match perfectly. In total the livery took a solid 10 hours.
By far the most difficult part were the gills behind the front wheels. These had to be done in multiple sections which required multiple swear words. About a week went by between the passenger and driver side. That didn’t help, because I forgot my tactic.


In the end, I was happy with the results.
Of course I needed to add my own flair to the livery. Not quite the required 15 pieces of flair, but we’re close!
The livery was done. The car was sorted. Every nut and bolt double checked. So I started packing every tool and spare part I could ever imagine needing.
I had to get a few beauty pics before loading up the car.


Death drinking coffee is my spirit animal. Most of this car was built on coffee and Rainier beer. (There’s a Rainer “R” on the engine lid)

It was time to load up! Luckily my buddy offered to lend me his trailer with race ramps. SO MUCH BETTER than the crappy U-haul I was going to rent. Next years big purchase will likely be a trailer. Loading the car took a measly 15 minutes in the rain. Loading a lowered, widened racecar onto a U-haul trailer is a test of patience.
I’ll admit, I had some real anxiety the week leading up to GTA. My track record isn’t the best (get it? “track record”?), I usually break stupid stuff. The last thing I wanted to do was roll into the event with a car this serious looking and have a wheel fall off in tech inspection, or at 130 mph.
If you’ve read this far, I commend you! Expect the GTA recap next post… sooner than later!